
In outdoor tennis court design, the windbreak net is an indispensable facility. It not only effectively reduces the impact of wind but also improves player focus, enhances privacy, and can be used for advertising. This article focuses on the windbreak net, covering its advantages and characteristics, selection criteria, installation techniques, and maintenance guidelines, helping you systematically understand and properly apply this key component.
I. Why Install a Tennis Court Windbreak Net?
Effective Wind Protection for Better Competitive Stability
Outdoor courts often face sudden changes in wind. Even slight variations can alter the trajectory of the ball and affect shot consistency. A windbreak net blocks wind, maintains airflow stability within the court, reduces wind interference, and helps players perform consistently.
Creates a Visual Barrier for Better Ball Control
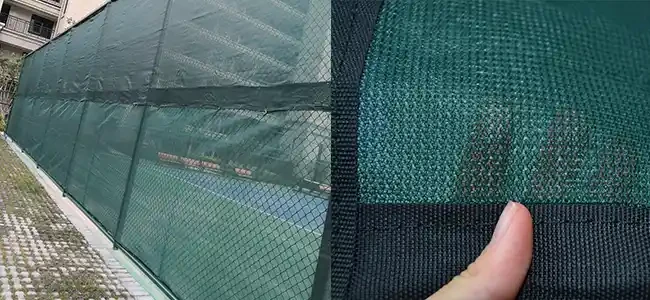
A windbreak net provides a uniform background, especially dark fabric backgrounds that do not blend with the ball. This helps players judge ball speed and trajectory more clearly, thereby improving concentration and shot accuracy.
Enhances Privacy and the Officiating Environment
On community or urban courts, spectator movement and external distractions are common. A windbreak net not only isolates interference but also protects player privacy, contributing to event security and order management.
High Value as an Advertising Medium and Branding Tool
Custom-printed windbreak nets are both functional and serve as advertising assets. Clubs can print logos or sponsor brands on the net, increasing exposure and commercial revenue.
II. Key Performance Indicators of Tennis Court Windbreak Nets
Wind Blockage Rate
Standard courts often use nets with about 50% wind blockage. For professional competition venues, a blockage rate of 60% or higher is recommended to achieve a more stable playing environment.
Material and Weather Resistance
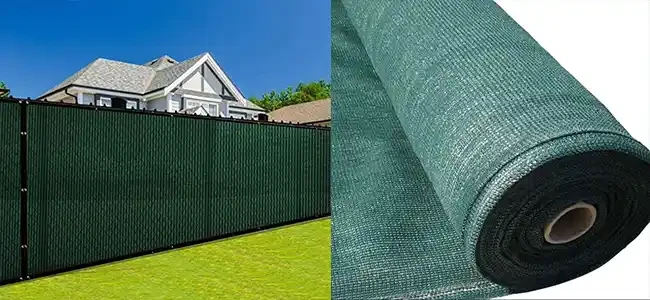
Quality windbreak nets are typically made of PE (polyethylene), PP (polypropylene), or nylon, featuring UV resistance, moisture resistance, and mold resistance. PVC-coated inner layers or PE-coating extend service life and adapt to harsh outdoor conditions.
Weave Density and Shading Level
A tighter mesh provides higher wind resistance but slightly reduces breathability. Common heights range from 6 to 9 feet (approx. 1.8–2.7 m). A balance between wind resistance and ventilation is needed. High-density PVC coating, horizontal ventilation holes, or wind relief openings help combine stability and airflow.
Quality of Reinforcement Accessories
The edges of the windbreak net should be sewn with multiple layers of reinforced fabric and equipped with brass grommets (every 18–30 cm), paired with high-strength weather-resistant zip ties. For nets of one meter in height or more, ventilation holes and support straps should be placed every 10 feet (∼3 m) to reduce wind load pressure.
III. How to Select the Right Tennis Court Windbreak Net
Determine Wind Protection Needs
Recreational courts: 50% wind blockage is sufficient.
Professional competition courts: 60%+ blockage recommended, e.g., models like TF-950.
Customize According to Court Dimensions
Typically, perimeter fencing for tennis courts is 4–6 m high. Windbreak nets can be selected as standard panels of 2 m × 18 m or custom-made in length and height.
Pay Attention to Material and Color
Dark green, dark blue, or black fabrics are neither glaring and blend well with the court environment. PVC-coated PE is wear-resistant and UV-resistant, while PP offers good breathability but slightly less weather resistance.
Structural Strength Requirements
A high-quality windbreak net should have four-layer edge stitching, double rows of brass grommets, ventilation openings or a central support rope per panel, and weather-resistant zip ties, S-hooks, or other fastening tools.
Brand and After-Sales Support
Choose manufacturers that offer custom logo printing, high UV resistance (3–5 years guaranteed), complete accessory kits, and installation guides.
IV. Installation Process for Tennis Court Windbreak Nets
Measurement and Layout
Measure the length and height along the inside of the fence, and create a numbered diagram. Keep panel lengths ≤ 60 feet for easier transport and installation.
Prepare for Installation
Prepare ladders, zip ties, S-hooks or tie wires. Order all accessories together with the net to avoid delays.
Fastening and Mounting
Start from one corner post, fasten the net using zip ties through the grommets. Pull the net taut horizontally and attach panel by panel. Two people are recommended – one to tension the net, one to secure it.
Add Ventilation Holes
If no pre-made wind relief holes exist, use scissors to cut small plus-sign slits at the bottom center or top of each panel, every 5–10 feet, to relieve wind stress.
Final Inspection and Adjustment
After installation, check the tightness of all ties to prevent bulging or tearing in the wind. Reinforce before extreme weather if needed.
V. Maintenance and Replacement Recommendations
Inspect grommets, zip ties, and seams annually for loosening or damage.
In areas with prolonged sun exposure, consider flipping the net every other year or cleaning it regularly.
If damaged area exceeds 10%, replace the entire panel to maintain visual and functional integrity.
After use, take down the net, dry it in the sun, and store it to prevent mold and extend service life.
Contact: +8615075482313
WhatsApp: +8615075482313
Email: yingruichina@gmail.com
Add: 100 meters west of Xiliangwa Village, Anping County, Hebei, China
We chat
